Getting started
What Solvera does for you
Solvera replaces spreadsheets, off platform quoting tools, and one off email quotes with a guided wizard on your store and a live bill of materials engine. You add your own Shopify products and tag them with the properties that matter (manufacturer, profile, color, compatibility). Solvera handles the conditional logic, quantity formulas, and product matching at runtime, including solar specific engineering like rail cut optimization, microinverter string packing, wire gauge selection, and pier spacing.
Your customers get a clean step by step experience with a running bill of materials. At the end they can email the quote, share it, or add the full system to the cart for checkout.
Prefer to watch first? This walkthrough covers the entire guide in seven minutes: sample catalog, module setup, publishing, the storefront experience, and sales rep mode.
1. Install the app
Install Solvera from the Shopify App Store. After you approve the access scopes, the app opens inside your Shopify Admin. On first run it opens on Home, a Get started checklist grouped into Set up your configurator, Go live, and After launch. Most steps tick themselves off as Solvera detects your work; the rest you tick by hand. Steps your plan does not include are greyed out and left out of the count, so the total varies by plan.
The app is embedded, which means it runs directly inside the Shopify Admin. There is nothing to download.
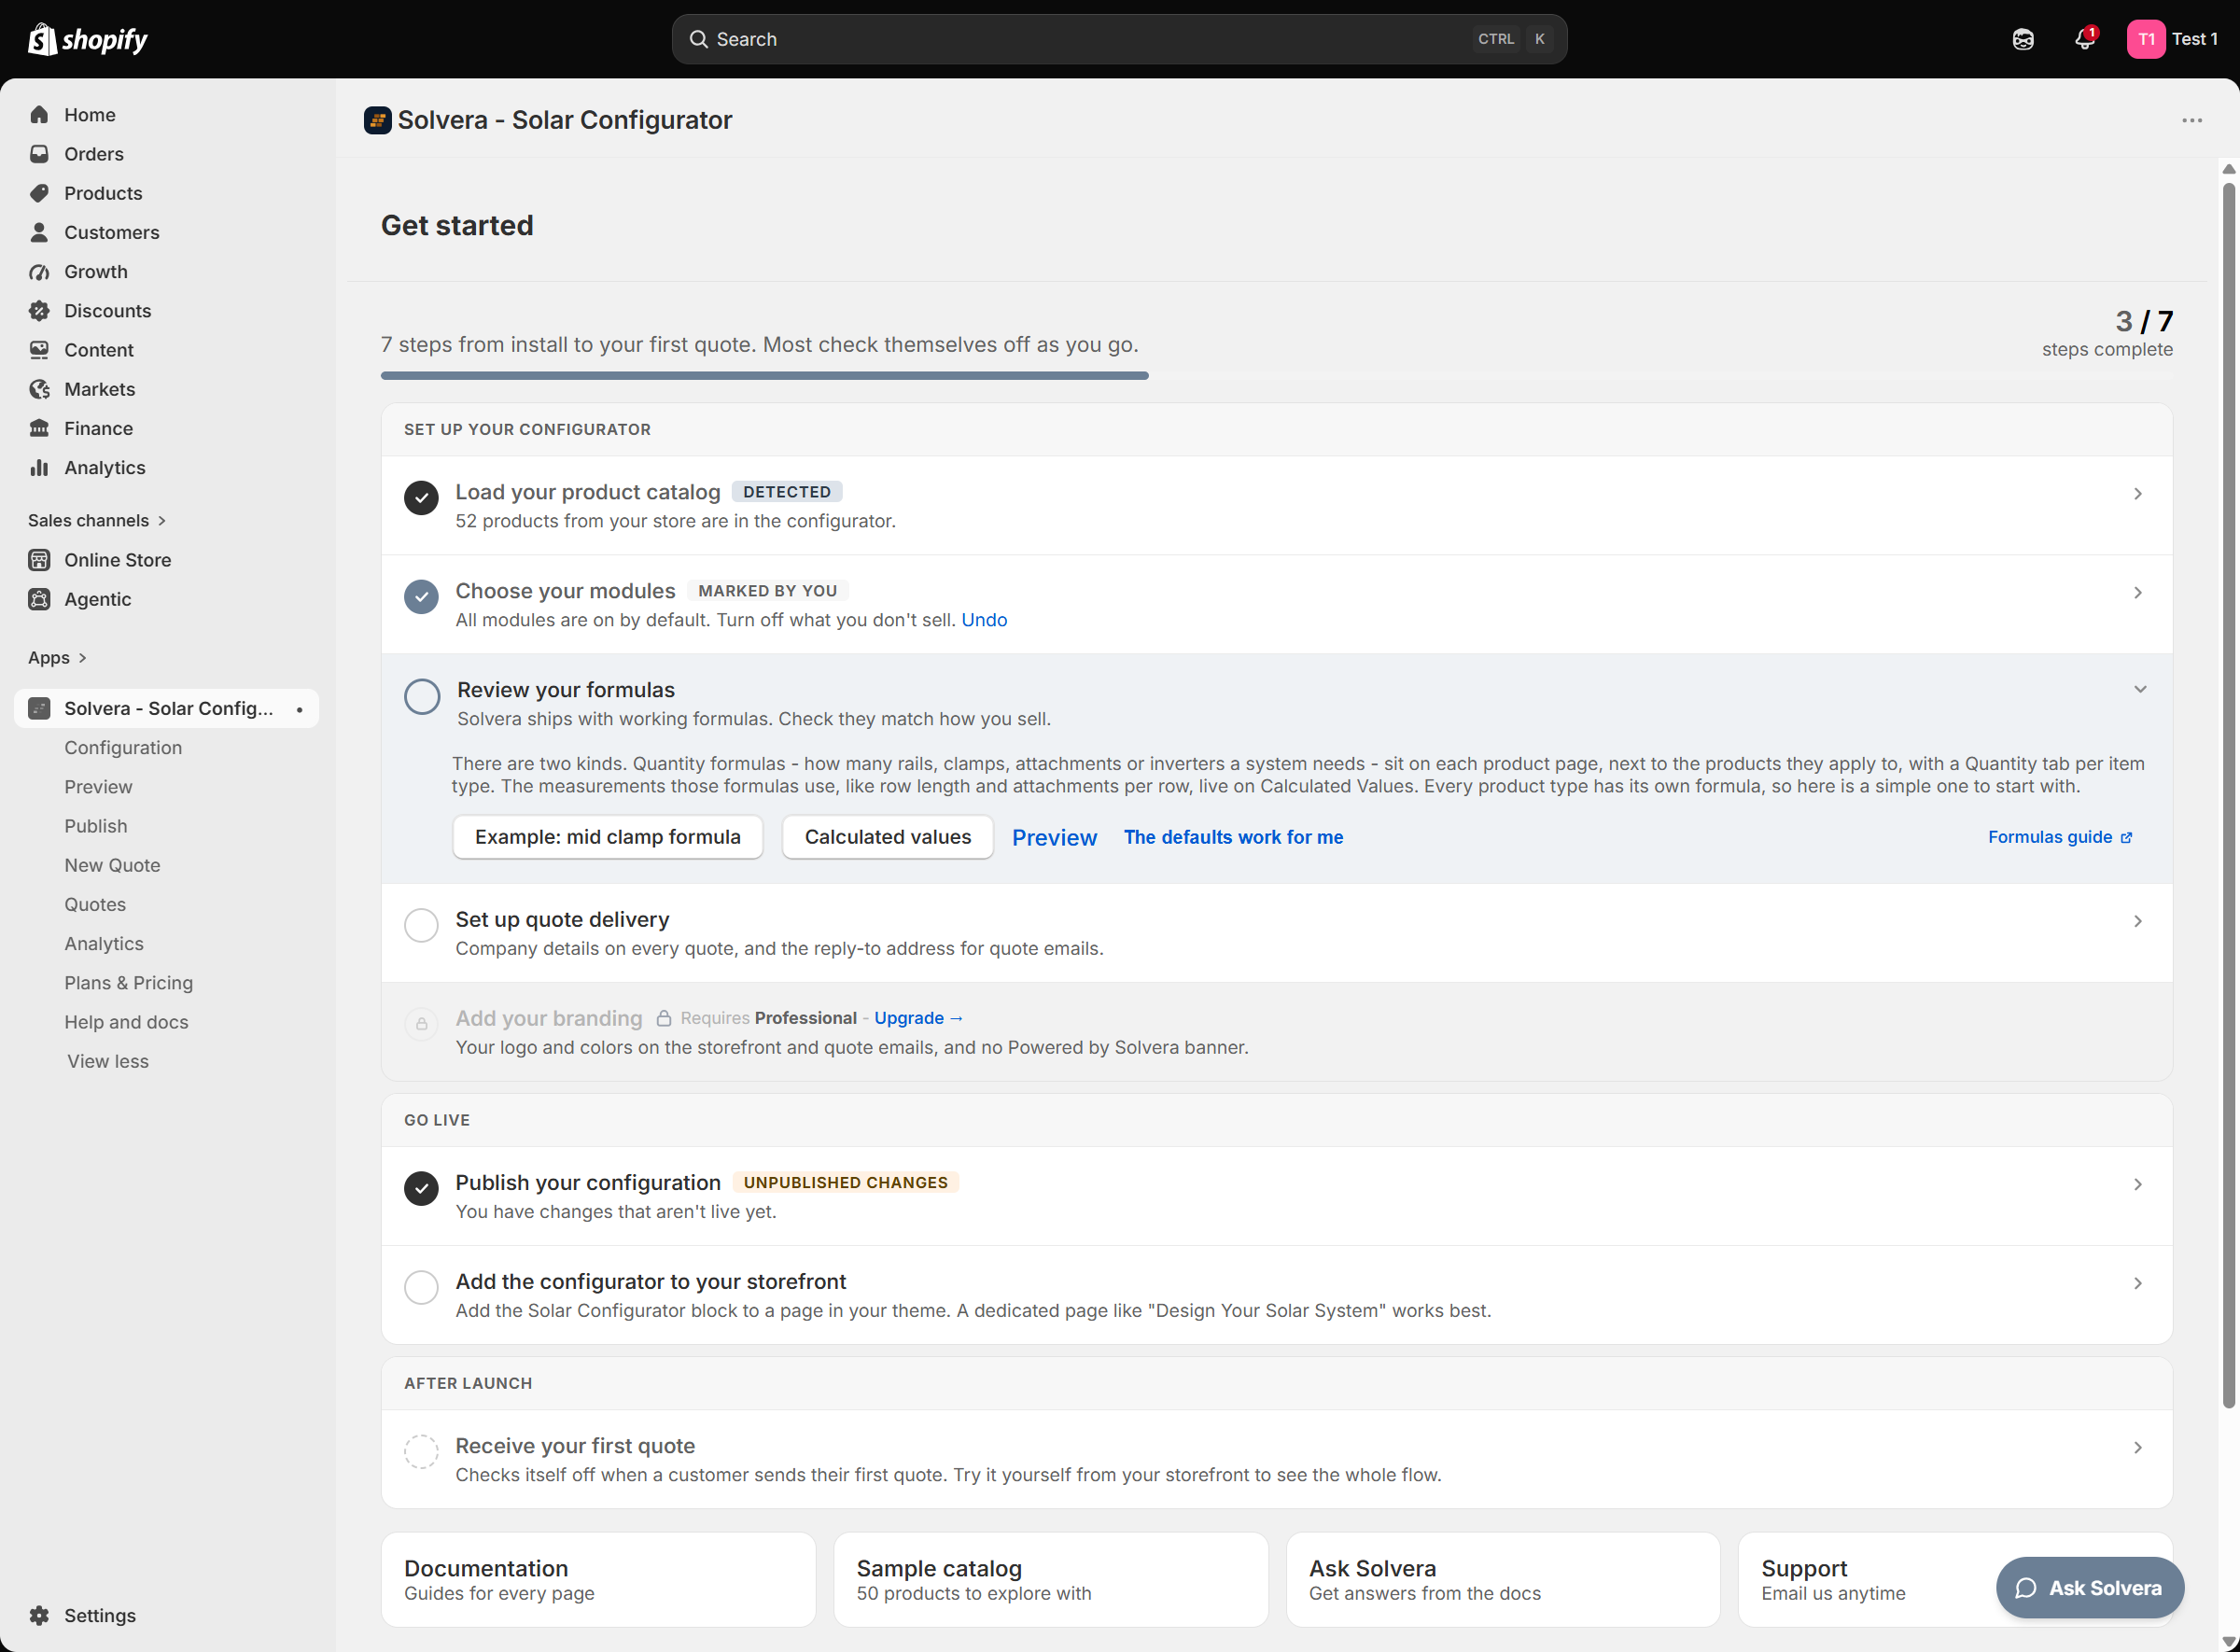
Below the checklist, a Last 30 days row shows quotes created, quote value, quotes emailed, and customers quoted, each compared with the previous 30 days. It appears on every plan; the full Analytics dashboard behind the View Analytics button is a Professional feature.
2. Understand the admin layout
Click Configuration in the app's left navigation to open the configuration area. Its sidebar is organized into four sections:
- Product Catalog: turn modules on or off and add your products.
- Calculations: control the questions customers answer and how quantities are computed.
- Customer Experience: control how the quote looks, how it is priced, how it is delivered, and your branding.
- Settings: measurement system, company profile, and API access.
At the bottom of the sidebar are the Preview and Publish buttons. The app's main navigation lists Home, Configuration, Preview, Publish, New Quote, Quotes, Analytics, Plans & Pricing, and Help and docs.
Help is built in. Every page description ends with a Learn more link to the matching section of this documentation, and an Ask Solvera button sits in the bottom-right corner of every admin page (in the Preview toolbar on the Preview page). It opens a panel where you can ask questions in plain language; answers come from this documentation and cite the page they came from. The same panel, with links to the guides and to support, is available as the Help and docs page in the main navigation.
3. Choose your modules
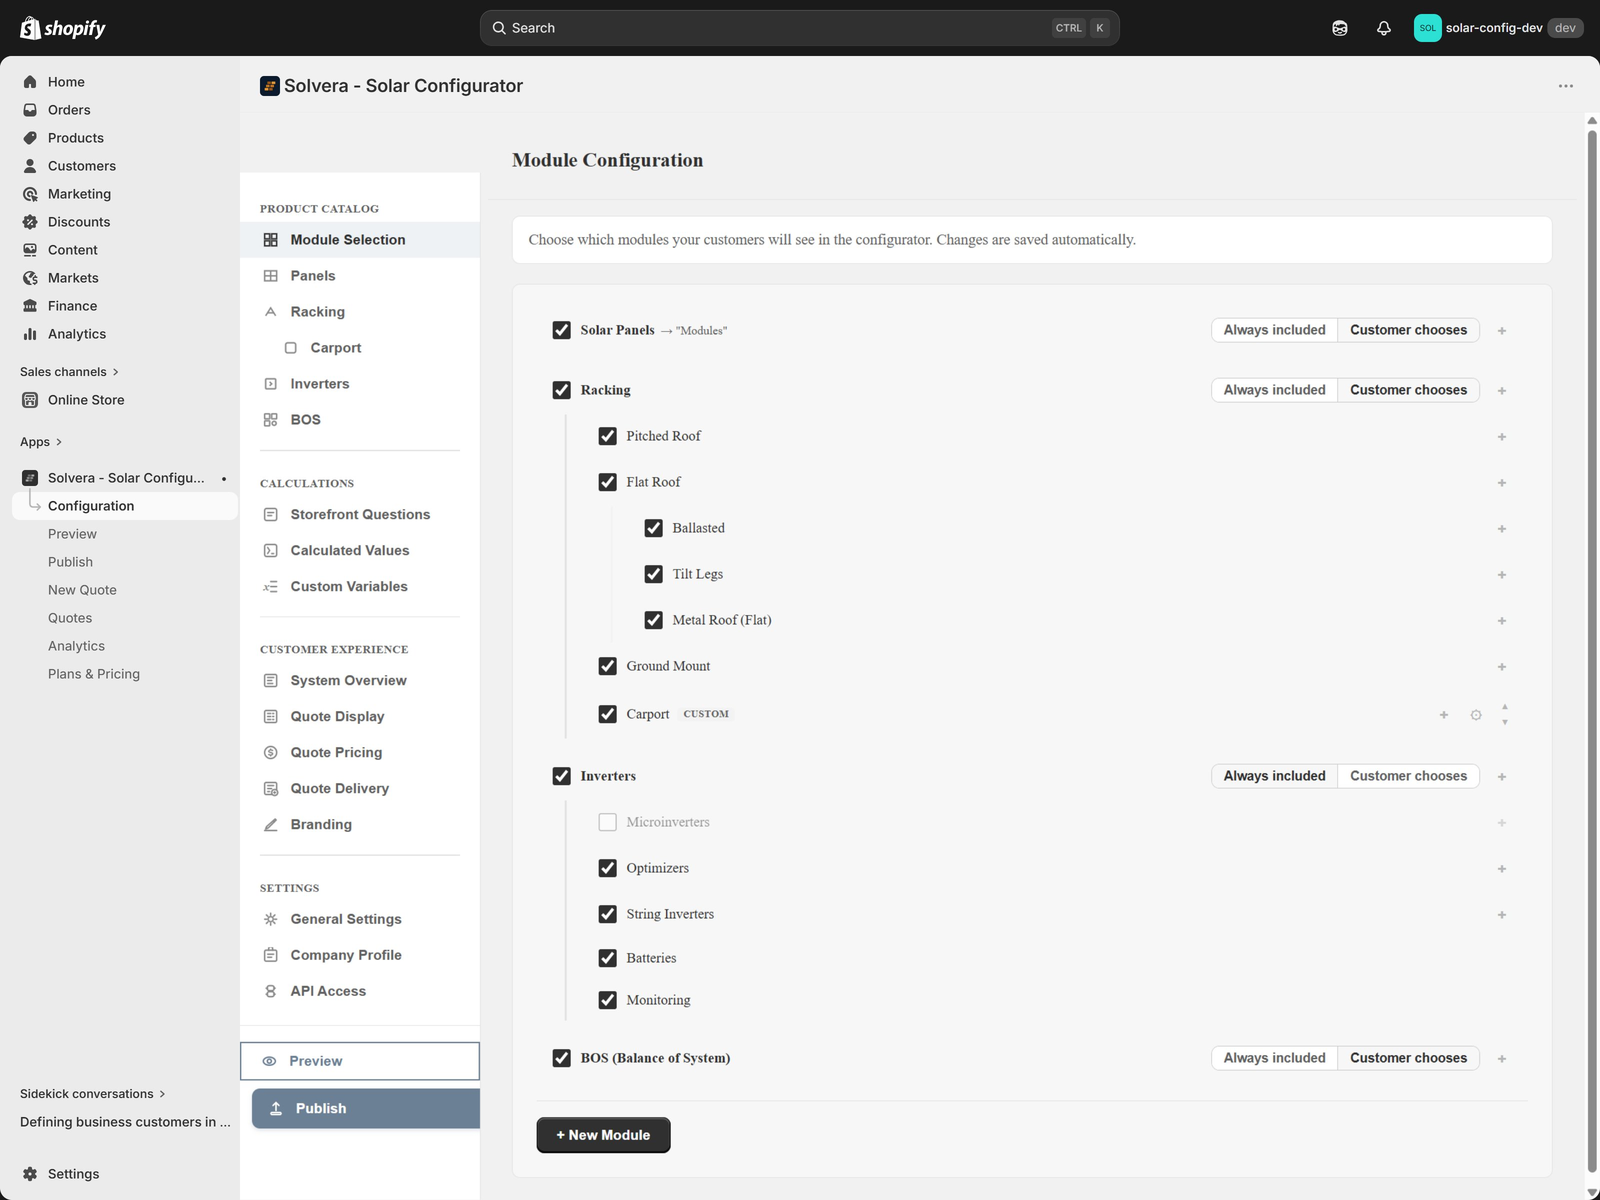
Open Configuration, then Module Selection under Product Catalog. A module is a top level part of a solar system:
- Solar Panels
- Racking (with sub types: pitched roof, flat roof, ground mount)
- Inverters (microinverters, optimizers and rapid shutdown, string inverters, batteries, monitoring)
- BOS (balance of system: wiring, connectors, wire management, grounding, safety labeling)
Toggle on the modules you sell. For each one, choose a selection behavior:
- Always included: the module is always part of the configuration.
- Customer chooses: the customer decides whether to include this module, using a "Choose Components" step at the start.
You can leave everything as "Always included" to start. You can change this anytime.
4. Add your products
Solvera reads products from your Shopify catalog, so create your products in Shopify first (with images and prices). Then add them into Solvera's product tables.
Open each module page (Panels, Racking, Inverters, BOS) and add products to the relevant item types. For example, in Racking you add rails under the Rails item type, clamps under Mid Clamps, and so on. Fill in the property columns so the engine can match the right product to each customer selection.
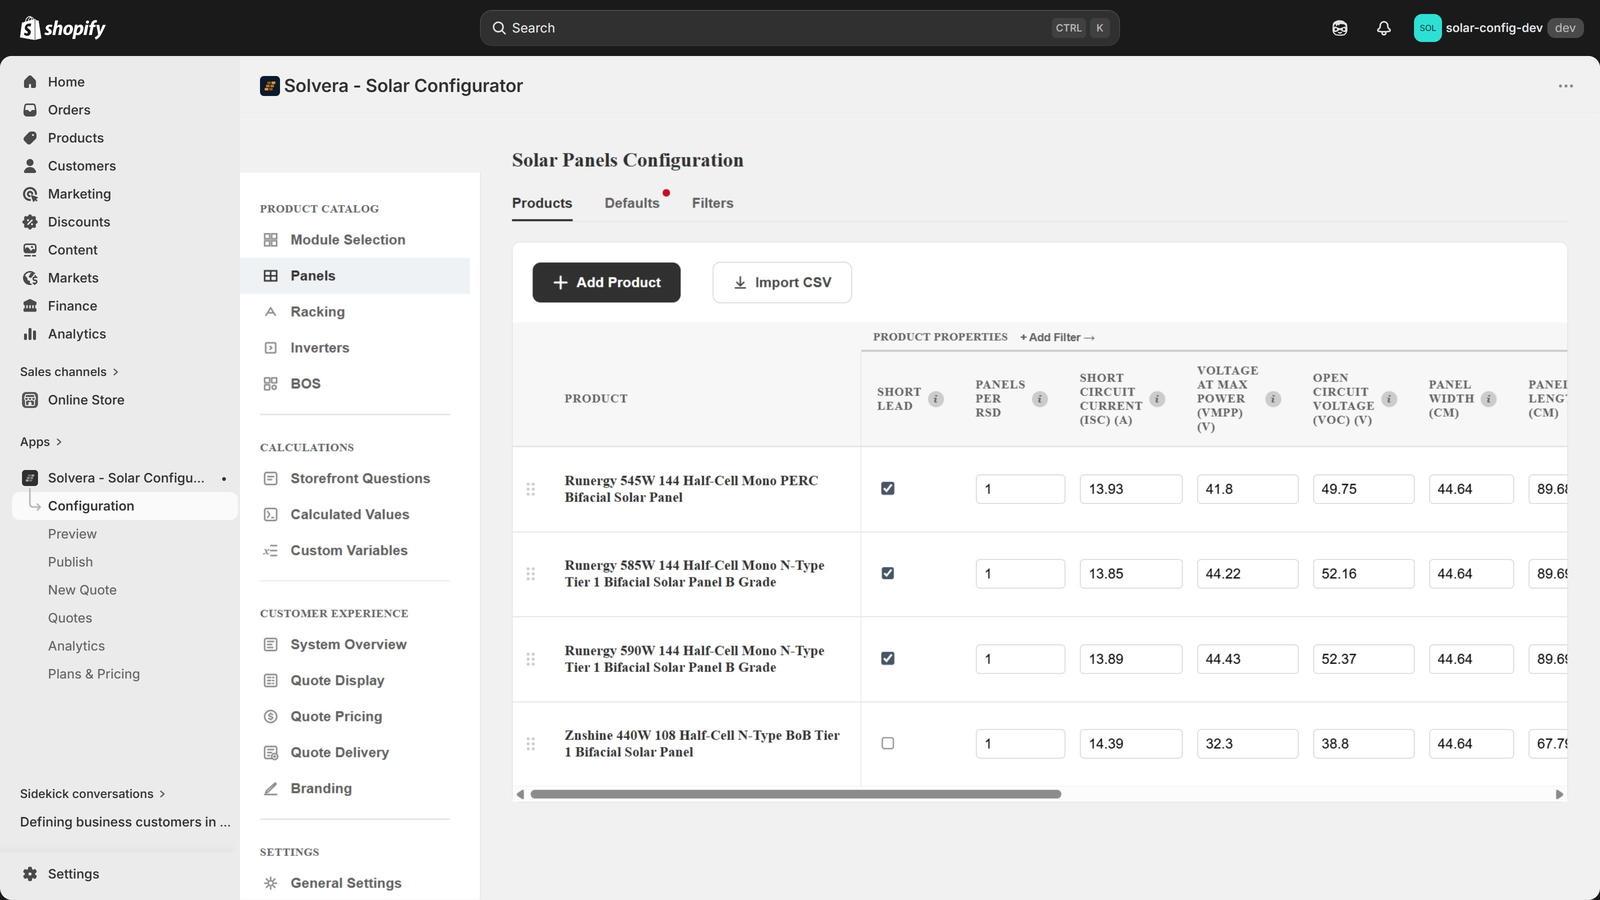
For full detail on product tables, multi scenario rows, coverage indicators, accessories, and CSV import, see Product Catalog.
Try it with a sample catalog
If you want to see the configurator working before you commit to entering your own catalog, load the built in sample set. On Module Selection a one line banner offers Set up samples, and the Home page has a Load sample catalog button that opens the same card.
- Click Download products CSV, then use the Open Products in Shopify link and import that file from Products > Import. This creates the sample products in your store with their images and prices.
- Back on the card, a live check reports how many of the sample products it can find in your store. Add sample products stays disabled until that check passes, then loads the matching rows into your Panels, Racking, Inverters, and BOS tables.
- Publish, and your storefront shows a complete working system you can configure end to end.
The samples cover the pitched roof racking path and include both a microinverter and a string inverter, so you can run a full configuration on either. Flat roof and ground mount are intentionally left empty; they use the same engine. The set is capped at 20 products per module so it works on every plan.
When you are finished, Remove in the same banner deletes only the sample rows and leaves anything you added yourself untouched.
5. Review your calculations (optional at first)
Solvera ships with sensible defaults for every quantity formula and engineering calculation, so you can launch without touching this section. When you are ready to fine tune, the Calculations section lets you adjust the questions customers answer and the calculated values, and each item type's Quantity tab holds its quantity formula. A simple one to start with is mid clamps: (panels - 1) * 2, found on the Racking page under Mid Clamps. See Calculations and BOM formulas.
6. Set up the customer experience
In the Customer Experience section you can:
- Configure the System Overview summary shown to customers.
- Control the Quote Display (what shows in the BOM sidebar and quote).
- Set Quote Pricing (tax, shipping, surcharges) Growth+
- Configure Quote Delivery emails.
- Apply your Branding (logo and colors) Professional
See Customer experience and branding.
7. Add the configurator to your storefront
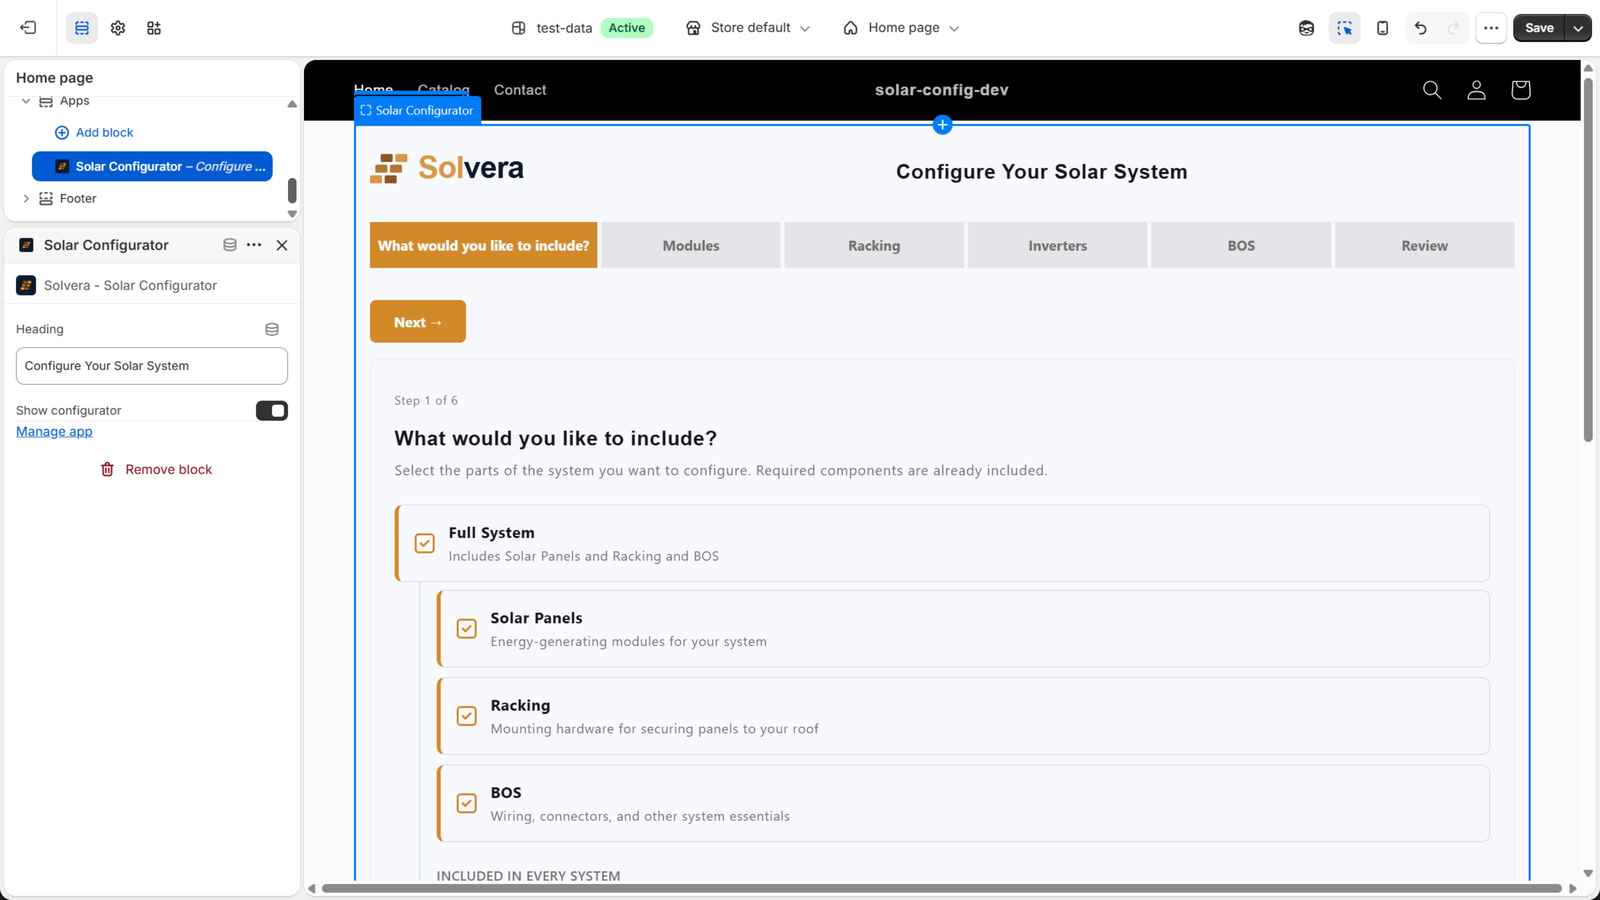
The configurator is delivered as a Theme App Block, so you do not need to edit theme code.
- In Shopify Admin go to Online Store > Themes.
- Click Customize on your live theme.
- Navigate to the page where you want the configurator. A dedicated page (for example "Design Your Solar System") works best.
- Click Add section or Add block and select Solar Configurator.
- Set the heading if you want a custom title.
- Click Save.
Once the block is on your published theme, the Add the configurator to your storefront step on the Home page shows Detected. If it says "Seen in your theme editor", save the theme; if it says "Seen on an unpublished theme", publish that theme so customers can reach it.
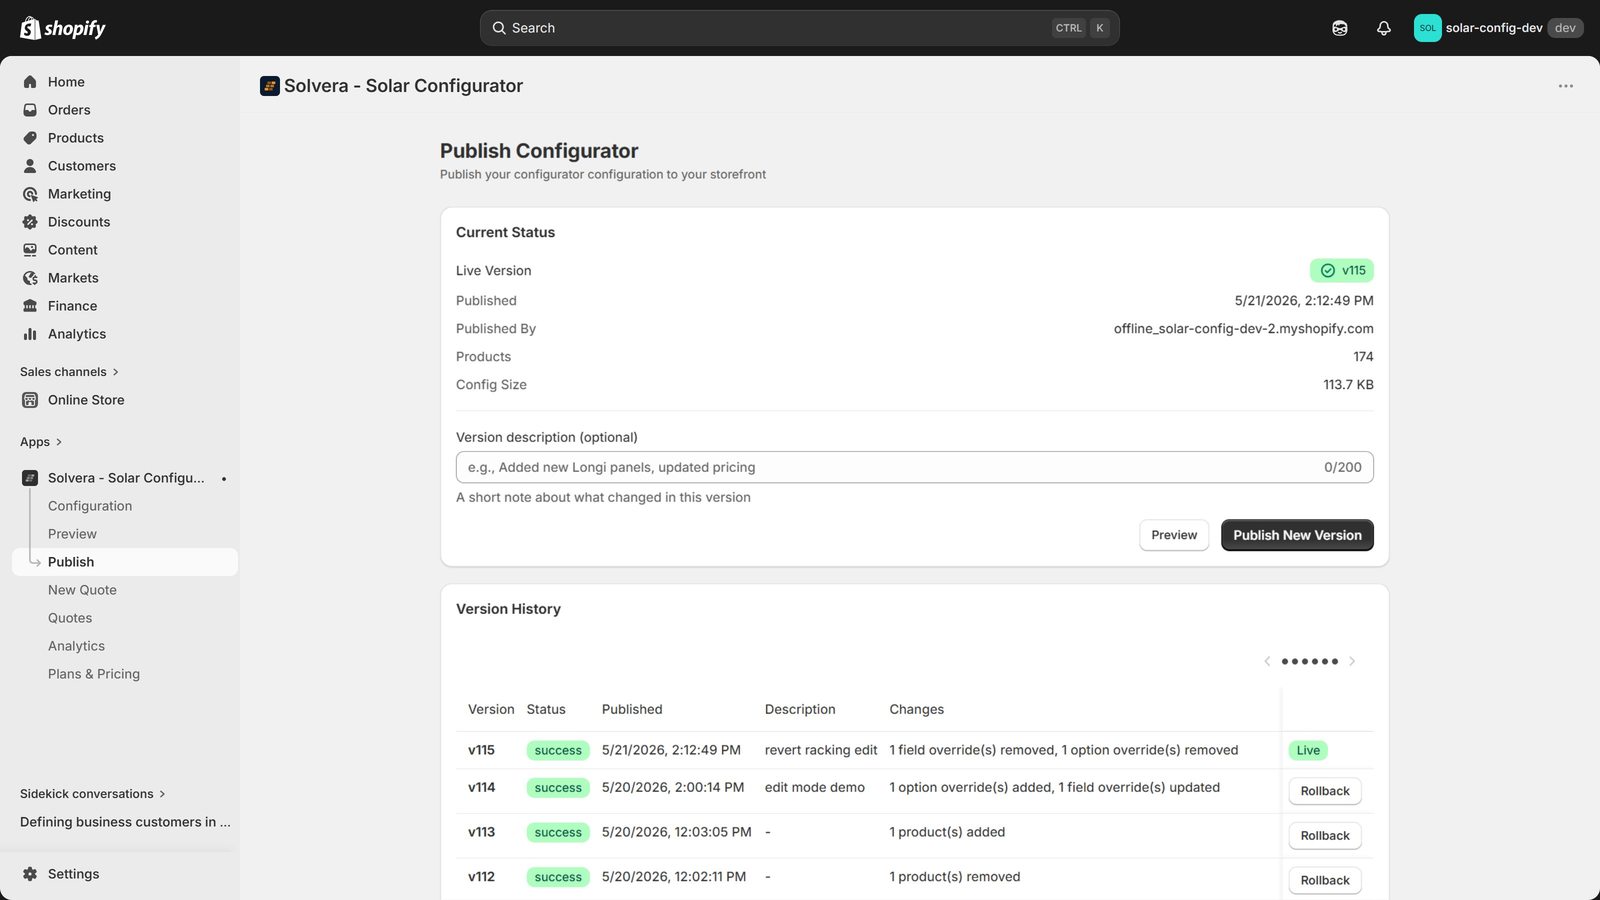
8. Publish
The storefront always shows the last published version of your configuration, so your customers never see half finished edits.
- Click Publish in the sidebar.
- Click Publish New Version.
- Solvera captures a snapshot of all your settings (products, formulas, branding, pricing, content, and quote settings) and serves it to the storefront.
Whenever you make changes later, the Publish button shows an "unpublished changes" indicator. Publish again to push those changes live. You can preview before publishing and roll back to any earlier version. See Publishing and versions.
9. Test it
Visit the storefront page where you added the block and run through the wizard as a customer would. Use Preview in the admin to test changes before publishing.
A note on measurement units
Go to Settings > General Settings to choose Imperial (feet and inches) or Metric (meters and millimeters). This cascades through all unit labels and dropdown values across the admin and storefront, including engineering values like pipe sizes.